• Document security at a glance
• Change document security settings
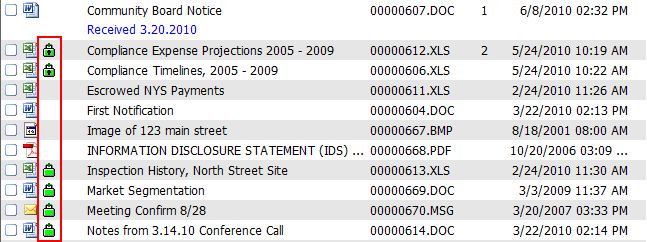
You can easily see which files on a worklist are protected. Note the green security symbols to the left of file listings:

Here's a key to security symbols that can appear on lists.
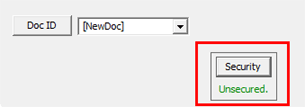
There are two ways to set security for profiled documents. Your first opportunity to do so comes during the profiling process itself - at least for files profiled during saves and certain copy/move operations - via the Security button.

That button is present on these profile forms:
Security can also be accessed via right-click or pull-down menu choices, with files selected on Worldox worklists.
To secure profiled documents:
Use the left-side navigation panel, search or other tools to find the worklist you need.
Highlight the
file listing(s) in the right-side worklist, then select Security
from the File pull-down list.
You could also click Security ![]() in
the toolbar, or right-click with the file(s) highlighted and select
Security from the right-click
menu. That opens the Security
Classifications dialog.
in
the toolbar, or right-click with the file(s) highlighted and select
Security from the right-click
menu. That opens the Security
Classifications dialog.
Note: You can secure multiple files at once. If you select more than one, Worldox asks you to confirm your selection, in the Clarify Selection dialog. If you see this dialog, choose the appropriate option and click Continue.
In the Security Classifications dialog:
The first three listings here standard, default settings available at every Worldox site:
• <Custom - Define rights by Groups/Users>
Selecting this opens the File Security dialog, where you can define a custom security classification for the file.
Note: Security classifications defined this way apply only to selected files; these classifications cannot be saved for future use.
• <Hidden - Invisible to everyone else>
Ensures that only you (and Worldox managers) can find or see the file on worklists.
• <Protected - Read Only to everyone else>
Allows other users to see the document and to view it, but they are prevented from making changes; only you can do that.
Any other classifications listed below these
top three have been created specifically for your site by your Worldox
Administrator or Manager. To see how security is set for any of these
classifications, just highlight (select) the classification, then click
View ![]() on the toolbar. That opens a read-only version of the File Security dialog, listing
the settings used for the selected classification.
on the toolbar. That opens a read-only version of the File Security dialog, listing
the settings used for the selected classification.
Tip: Choose Hidden – Invisible to everyone else if you do not want other users to see the file. Choose <Protected - Read Only to everyone else> if you want to make the file read-only. That allows users to view - but not edit - the file. |
With a classification selected, click Select.
![]() Next steps:
Next steps:
• If you have selected any classification other than <Custom - Define rights by Groups/Users>, Worldox applies the selected security, and displays a message confirming this. Click OK to acknowledge the confirmation message. No additional action need be taken.
• If you chose <Custom - Define rights by Groups/Users>, you next customize security settings in the File Security dialog.
Use the left-side navigation panel, search or other tools to find the worklist you need.
To find secured worklist files, look for these icons to the left of file listings.
![]() Green lock icon with keyhole = read-only protected
Green lock icon with keyhole = read-only protected
![]() Green lock icon = security-protected, not read-only
Green lock icon = security-protected, not read-only
Note: These symbols denote secured files for which you have the rights to change security. Here is a key to all security symbols that can appear on lists.
Highlight the secured file listing(s)
in the right-side worklist, then select Security
from the File pull-down list.
You could also click Security ![]() in
the toolbar, or right-click with the file(s) highlighted and select
Security from the right-click
menu. That opens the Security
dialog.
in
the toolbar, or right-click with the file(s) highlighted and select
Security from the right-click
menu. That opens the Security
dialog.
Note: You can change or set security for multiple files at once. If you select more than one, Worldox asks you to confirm your selection, in the Clarify Selection dialog. If you see this dialog, choose the appropriate option and click Continue.
In the Security dialog:
• Click Classify to start over, securing the document in a different way. This action opens the Security Classification dialog, where you can choose other security classifications and settings, as instructed above.
• Click Reclassify to adjust security settings. This action opens the File Security dialog, and is essentially the same as customizing security. Here are step-by-step instructions for customizing security.
• Click Declassify to remove security from this document.
• Click Properties to open a read-only version of the File Security dialog, which lists the settings used to secure this document.
Use the left-side navigation panel, search or other tools to find the worklist you need.
To find secured worklist files, look for these icons to the left of file listings.
![]() Green lock icon with keyhole = read-only protected
Green lock icon with keyhole = read-only protected
![]() Green lock icon = security-protected, not read-only
Green lock icon = security-protected, not read-only
Note: These symbols denote secured files for which you have the rights to change security. Here is a key to all security symbols that can appear on lists.
Highlight the secured file listing(s)
in the right-side worklist, then select Security
from the File pull-down list.
You could also click Security ![]() in
the toolbar, or right-click with the file(s) highlighted and select
Security from the right-click
menu. That opens the Security
dialog.
in
the toolbar, or right-click with the file(s) highlighted and select
Security from the right-click
menu. That opens the Security
dialog.
Note: You can change or set security for multiple files at once. If you select more than one, Worldox asks you to confirm your selection, in the Clarify Selection dialog. If you see this dialog, choose the appropriate option and click Continue.
In the Security dialog, click Declassify to remove security from this document